Before you start wondering how to clean your oven, it’s important to understand how it works. In this blog post, we will take you through the basics of how oven functions and what needs to be done in order to keep it operating at its best. From cleaning schedules to Troubleshooting 101, we have everything you need to know in order to keep your oven in top shape. So read on and learn all about ge self cleaning oven instructions!
What is a Ge Self Cleaning Oven instructions?
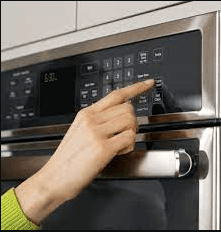
GE self cleaning oven instructions oven is a great option for busy people who want to cook healthy meals without having to spend hours in the kitchen. The oven uses sensors and a fan to clean itself, so you don’t have to. Here are instructions on how to use a ge self cleaning oven:
1. Preheat your oven according to the instructions on the packaging.
2. Place your food into the oven on a baking sheet.
3. Close the door of the oven and wait until the sensor has detected that there is no dirt or debris on the food, which should take around 15 minutes.
4. Once the sensor has confirmed that all of the food is clean, press any buttons on the front of the oven to turn off all of its functions except for “self-cleaning” mode.
5. Place your cleaned food onto a serving dish and enjoy!
How Does a Ge Self Cleaning Oven Work?
A self-cleaning oven is a great addition to any home because it helps to reduce the amount of time that you have to spend cleaning. The oven works by using an air circulation system that moves the hot air around the oven, which helps to clean it.
To use a self-cleaning oven, there are a few things that you need to know. First, you will need to open the door and set the timer for 10 minutes. After 10 minutes have passed, close the door and wait another 5 minutes. The oven will then automatically start cleaning itself.
When using a self-cleaning oven, be aware that it can be loud. Also, make sure that your floor is flat and polished so that the air circulation system can work properly. Finally, be sure to read the instructions carefully before using your new oven so that you know how to properly clean it.
How to Install a Ge Self Cleaning Oven
Ge Self Cleaning Oven Installation:
1. First, make sure that you have a working oven and power supply.
2. Next, remove the oven racks.
3. If your oven has a door on the front, remove the door panel.
4. If your oven does not have a door on the front, remove the uppermost sheet of metal from beneath the oven with a screwdriver or prying tool.
5. Locate and unscrew the two screws that hold in the heating element coverplate.
6. Carefully lift up the coverplate and disconnect the wires connected to it (see image).
7. Disconnect all of the other electrical components in proximity to where you are removing the coverplate – they may include thermal sensors, fan motors, etc., depending on your model of oven.
8. Put everything back together in reverse order – paying close attention to where connections are made! Don’t forget to reconnect any cables that were disconnected in Step 7!
9. Replace the coverplate and screws (see image). Be sure to tighten them properly!
10. Reattach any panels or trim if necessary and re-connect any cables that were disconnected in Step 7…you’re done!
How to Use a Ge Self Cleaning
To use your ge self-cleaning oven, first make sure that the oven is completely clean. Then, follow these simple instructions:
1) Preheat the oven to its recommended temperature.
2) Place the food that you want to cook in the oven.
3) Close the door of the oven and wait until the timer goes off.
4) Allow the food to cool before cleaning up. Read more…
Conclusion
Thank you for reading our article on how to use the ge self cleaning oven instructions. We hope that we have been able to provide you with all the information you need to get started with this popular appliance. In addition to our tips, we also suggest visiting GE’s website for more detailed instructions and frequently asked questions (FAQs). If you have any questions or comments after reading our article, please feel free to leave them below. We would appreciate hearing from you!